Monday, August 2, 2010

The Poutine Queen in Almonte


The Poutine Queen in Almonte is 45.6 km and 41 minutes from our door, so one might ask why would we travel so far for chip truck fare when S & G Fries is but 1.1 kms away and has a solid track record with our resident expert, the teenager.

There are two reasons that we made the drive today.

First, we heard on Friday that CTV Ottawa was in search of the best chip truck in the region. We have been following the website closely and also their Twitter account @CTVOttawa. As of this afternoon, the tally of the top 10 so far looked like this:
  1. Wes's Fries in Arnprior
  2. The Poutine Queen in Almonte
  3. Claude's Chip Stands at Cummings and Ogilvie
  4. Glen's on Richmond Road, Westboro
  5. The double decker bus in Manotick
  6. S & G Fries at Carling and Maitland
  7. Mike's Chips on Bridge Street in Carleton Place
  8. JP's Fries at Baseline and Clyde
  9. The Magic Fryer at Canadian Tire on Coventry Road
  10. Woody's Pit on Highway 7 near Innisville
Of the top 10, our resident expert had only had experience with 1, 4, 5 and 6. He personally would have rated S & G Fries higher than Glen's but this vote is just really one of popularity, not so much about ranking. And it is no surprise to anyone that Wes's Fries is leading the pack. But what about some of these other chip trucks so high on the list? What were they all about? Perhaps it was time to check out The Poutine Queen or Claude's Chip Stands.

Secondly, my MIL has had a request in with us for a month now that she would like to be taken out for chip truck fries some day. She just recently had another big numbered birthday (from here on in they are all big numbers) and although she can't drive anymore and has a few health issues, she seems virtually indestructible. Our guess is that if she wanted to do chip truck fries she likely would not hear much objection from her doctor, despite their questionable level of sustenance. If chip truck fries is what she wants, chip truck fries she will get. And today we would make good on our promise. The setting was ripe for doing product research.

With the MIL's assignment at hand and new information pouring at us from the web, we decided that taking a Sunday drive on a holiday Monday could justify the long road to Almonte. So the family piled in and off we went. Rolling miles of pavement, groves of trees, fields laden in sparse brush and soon we found our way to the pink truck in sleepy, downtown Almonte. It is located on High Street, just off of Bridge Street and beside the self-serve car wash. If it wasn't for the promotion sign in the window announcing the CTV Ottawa's search, you would never know that this place was holding second spot. There was no one around. I don't know when they close up at night but I was guessing that at 4:45 pm, we might be close to closing time.

The boys picked poutine and the girls picked fries. Although they were tasty, it was unanimous that it wasn't worth going the 45.6 kms when S&G Fries is just around the corner. The poutine fries were a bit cooled off since they came right from the 'wait' bin. The plain fries were piping hot as they came fresh from the fryer, but they were just too bland and needed more cook time. Our favourite fries have a crispy outside but a full, soft, well-cooked centre. I do see why Almonte might be fond of the eclectic pink truck and all it has to offer. After all, they do have Stuffed Poutine, heard to be all the rage.

On the plus side, the small fry at $2.75 was substantial and many extra fingers had to dig in to help the MIL with her bounty. In the end, she enjoyed the outing, the time to chat and the tasty fries that awaited her at her destination. These fringe benefits made the distance seem insignificant. Product research aside, today, this visit to a winning-est chip truck was all about her.

In the language of the Poutine Chronicles, this place is 3.5 curds out of 5.


The Poutine Queen
High Street near Bridge Street
Almonte, Ontario

Mustard Greens in Celebration of Food Day in Canada 2010


Mustard greens, or mizuna, is sometimes said to be piquant, mild peppery flavor, slightly spicy. So when I decided to use them for the Food Day in Canada celebration this weekend, I knew I needed a recipe that stood up to its strength, and for it to also be included with other dishes that would be a bit milder, in order to create balance. I decided to to go a bit Asian with the greens and picked a recipe from Simply Recipes called Mustard Greens.


This recipe allowed me to use all my mizuna and the remaining onions from my Roots and Shoots Farm CSA food basket. I found I tended to enjoy a bite of my mustard greens together with a bite of my stuffed chicken. I love what the sesame oil does to tame the strong taste of the greens. I think toasted sesame seeds could have been a nice touch. It truly was a special Food Day celebration.


MUSTARD GREENS
Source: Simply Recipes

1/2 cup thinly sliced onions
2 cloves garlic, minced
1 Tbsp olive oil
1 pound mustard greens, washed and torn into
large pieces
2 Tbsp chicken broth (2 to 3), or vegetable broth
1/4 teaspoon salt
1/4 teaspoon pepper
1/4 teaspoon dark sesame oil

In a large sauté pan, sauté onions in olive oil over medium heat until the onions begin to brown and caramelize, about 5 to 10 minutes. Add the minced garlic and cook a minute more, until fragrant.

Add the mustard greens and broth and cook until the mustard greens are just barely wilted. Toss with sesame oil. Season with salt and pepper. Serves 4.

Red Chard Risotto in Celebration of Food Day In Canada 2010


The risotto was another great side dish for our Food Day in Canada celebration this weekend. This recipe is adapted from one we found on the Epicurious website called Red Chard Risotto. The motivation for trying the dish was to make something special with our Swiss chard that came in this week's CSA food basket from Roots and Shoots Farm. One of our celebration guests was Italian so she lovingly brought all the ingredients together to perfection. Nice when it can be authentic too!


RED CHARD RISOTTO
Adapted from a recipe by Sandra Rudloff: Los Altos, California found in Bon Appétit - February 1996

5 1/2 cups homemade turkey stock
2 tablespoons olive oil
1 medium onion, chopped
1 1/2 cups arborio rice
1 bunch Swiss chard (about 4 cups of leaves coarsely chopped and then stems diced)
1/2 cup dry white wine
1/2 cup Parmesan cheese, freshly grated
1 tablespoon butter

Bring broth to simmer in medium saucepan. Cover and keep warm.

Remove stems from chard leaves and dice. Coarsely chop chard leaves.

Heat oil in heavy large Dutch oven over medium heat. Add onion and chard stems and sauté until onions are translucent, about 5 minutes.

Add rice and stir for about 3 minutes. Add wine and simmer until absorbed, stirring occasionally, about 2 minutes.

Add hot broth 3/4 cup at a time. Simmer rice and stir constantly until the broth is absorbed. Then add another 3/4 cup of broth and repeat. When the last broth is added, also add the chard leaves. They will cook down very quickly. Simmer until rice is just tender and risotto is creamy. The entire cooking time is about 20 minutes. Mix in 1/2 cup Parmesan cheese; season to taste with salt and pepper. Add butter and stir. Consider adding more Parmesan cheese. Serves 6.

Breaded Stuffed Chicken Breasts with Goat Cheese and Thyme Filling


Our Food Day Canada 2010 party raged on from zucchini rolls to carrot and cilantro soup to a main course loaded up with many things green. The main act was our stuffed chicken. A mild flavour in comparison to our very zesty Italian salad and the strong taste of our Asian mustard greens. I found it worked well to take a bite of my chicken with the mustard greens to balance each other out. It was a plate with pow. I did use a Roots and Shoots Farm CSA onion for the filling. My supply is starting to dwindle. I liked the chicken and would make it again and would put more thyme in the filling or perhaps other flavours with the thyme, like sun-dried tomatoes. It made for a nice presentation sliced vs. just getting the big 'loaf'!


BREADED STUFFED CHICKEN BREASTS WITH GOAT CHEESE AND THYME FILLING
Source: The Best Chicken Recipes by the Editors of Cook's Illustrated


4 boneless skinless chicken breasts, tenderloins removed, 5 to 6 ounces each

cheese filling (see recipe below)

2 cups panko (Japanese bread crumbs), toasted

1/2 cup all-purpose flour

1/4 teaspoon salt

1/8 teaspoon pepper

3 large eggs, lightly beaten

1 teaspoon Dijon mustard


Butterfly each chicken breast by slicing it lengthwise almost in half (starting on the thinnest side) and then opening it to create a single cutlet. Place each cutlet between sheets of plastic wrap and pound until the cutlets are about 1/4-inch thick. Pat the chicken dry with paper towels and season with salt and pepper.


Place a quarter of the cheese filling in the center of the tapered end of each chicken breast. Roll the chicken tightly over the filling to completely enclose it and form a cylinder. Press the seam to seal. Repeat with the remaining chicken and filling. Refrigerate the chicken, seam side down and uncovered, for 1 hour to allow the edges to seal further. This step is very important.


Combine the flour, salt and pepper in a shallow dish and whisk the eggs and Dijon together in a second shallow dish. Working with 1 chicken breast at a time, dredge in the flour, shaking off the excess, then coat with the egg mixture, allowing the excess to drip off. Finally, coat with the panko, pressing gently to adhere the crumbs.


The breaded chicken can be stored in an airtight container in the refrigerator for up to 24 hours. Increase the baking time by 5 to 10 minutes then.


When you are ready to bake, preheat oven to 375ºF and place the chicken at least 1 inch apart on a wire rack set over a foil-lined rimmed baking sheet. Bake until fully cooked (an instant read thermometer should register 160ºF to 165ºF), about 35 minutes.

Let rest for 5 minutes before serving.


Goat Cheese and Thyme Filling


1 tablespoon unsalted butter, softened

1 small onion, minced

2 teaspoons minced fresh thyme leaves

1 small garlic clove, minced

3 oz cream cheese, softened

2 oz goat cheese, softened

1/8 teaspoon salt

1/8 teaspoon ground black pepper


Melt the butter in a medium skillet over medium heat. Add the onion and cook, stirring occasionally, until well browned, about 10 minutes. Stir in the thyme and garlic and cook until fragrant, about 30 seconds; set aside to cool.


Mix the cooled onion mixture, cream cheese, goat cheese, salt, and pepper together until uniform.

Zucchini Rolls with Goat Cheese and Kalamata Olives in Celebration of Food Day Canada 2010


My two beautiful zucchinis from my Roots and Shoots Farm CSA basket this week became our appetizer for our Food Day Canada 2010 celebration.

I have had a similar delight a number of years ago from the The Fine Cooking Magazine July 2002 Issue #51, Page 55 called Grilled Zucchini & Goat Cheese Roll-ups. When I recently came across an adaption of this recipe on the blog site of Dara Michalski (a Canadian living in Utah), whose blog is Cookin' Canuck, I knew exactly where my zucchini's were headed. Dara's Fine Cooking adaptation is called Grilled Zucchini Rolls with Herbed Goat Cheese & Kalamata Olives.

Thank you Dara from bringing back an old favourite for me and giving my summer squash purpose for Food Day Canada 2010! I followed her recipe but used plain goat cheese instead of herbed since that is what I had on hand.


GRILLED ZUCCHINI ROLLS WITH GOAT CHEESE & KALAMATA OLIVES
Adapted from Dara Michalski, whose blog is Cookin' Canuck, and she adapted from a Fine Cooking Magazine recipe

2 zucchinis, one green and one yellow
Olive oil
Kosher salt
Freshly ground black pepper
3 1/2 oz. goat cheese
1 1/2 oz. (about 7 or 8) kalamata olives, finely chopped

Preheat grill to high heat.

Slice a strip lengthwise from the zucchini to expose the inside of the vegetable. Cut the 2 ends from the zucchini to make straight edges. Cut the zucchini lengthwise into 1/4-inch strips. You should get about 7 slices per zucchini. I use a mandolin to make the slices.

Brush both sides of the zucchini pieces liberally with olive oil. Season well with kosher salt and freshly ground black pepper. Lay the zucchini pieces on the grill at a 45-degree angle (for more attractive grill marks). Cook until the zucchini is very tender, but not mushy, about 3 minutes per side, moving the pieces during cooking to ensure even browning.

Remove zucchini from the grill. Set a wire cooling rack on top of a bowl to give the cooling rack extra clearance from the counter. Drape the zucchini pieces on the rack to cool. This method will stop the zucchini from steaming will cooling.

Place goat cheese in a medium bowl. Stir olives into the goat cheese.

Spread a layer of the goat cheese mixture onto one side of each zucchini piece. Gently roll each piece of zucchini. Serve.

I was able to get 15 rolls from my two zucchinis.

Carrot Soup with Coriander in Celebration of Food Day Canada 2010


Food Day Canada
was a great day to use produce from my latest CSA food basket from Roots and Shoots Farm. The soup I made incorporated all my orange and white carrots, two of my onions and two of my potatoes. We ate outside under the beautiful night sky with special friends, many a candle lit, the fountain flowing and nary a bug in sight.


CARROT SOUP WITH CORIANDER

2 pounds carrots
1 potato
3 ounces unsalted butter
1 small onion, peeled and diced
1 tablespoon chopped garlic
3 tablespoons fresh cilantro
4 cups chicken broth
1/2 teaspoon sugar
1/4 teaspoon salt
1 large bay leaf
1/8 teaspoon celery salt
1/8 teaspoon cayenne
1/4 cup chopped fresh cilantro
dry sherry
homemade croutons
deep-fried onion greens, match stick width and 2" in length

Peel the carrots and cut crosswise into 1/2 inch pieces (about 5-6 cups). Peel the potato and cut into small cubes (about 1 1/2 cups).

In a large saucepan over medium-low heat, melt the butter. When hot, add the onion and sauté while stirring occasionally, until translucent, 5-6 minutes. Add the garlic and sauté while stirring until beginning to change color, 20-30 seconds.

Add the carrots, potatoes, and fresh coriander and sauté, stirring a couple of times, for about 2-3 minutes. Add the chicken broth, sugar and salt and, over medium heat bring to a simmer. Lower the heat, cover partially and continue simmering until vegetables are soft when pierced with the point of a knife, about 20-25 minutes.

Use a food processor with its metal blade attached, or a blender, and process the vegetables in small batches, with their broth, until a smooth purée (soup may be made ahead to this point; cover and refrigerated). We use our Vita-Mix and it always gives a great consistency for soup.

Return the soup to the saucepan. Add the bay leaf, celery salt and cayenne to the soup and let it simmer on a very, very low simmer for 2 or 3 hours to really incorporate the flavours. An hour before serving, add more fresh cilantro, finely chopped. Taste for seasoning and adjust as necessary. If the soup is too thick, add more stock or you could use milk. Remove the bay leaf.


To plate, put one tablespoon of sherry in the bottom of each bowl. Ladle the soup on top. Garnish with homemade croutons (I make mine with a hint of garlic and black pepper for a kick) and deep-fried onion greens. Another way to garnish could be a dollop of sour cream and a generous sprinkling of chopped cilantro.

Saturday, July 31, 2010

Cozy, Comfy Pesto - A Kitchen Maturing


There is no picture of the pesto penne dinner tonight because it was that good. Gone before the idea of a camera entered our heads.

I am at stage in my life where I want less, not more. Less clutter, less issues, less to-do's, less noise, less stuff. I have a few boxes of keepsakes and trinkets from my past down in the basement. The volume is not embarrassing. I have boxes of half started projects, put on hold for more important uses of my time. Again, the volume is not embarrassing. I have a box of clippings of recipes and food stories that someday I might try. Still, the volume is not embarrassing. And tucked in that box of recipe clippings is part of my historical collection of recipes actually written out on 4" x 6" recipe cards.

Some 15+ years ago I decided to launch into the digital age and I keyed most of the favourite recipes collected to-date into a product called Foodware, a software product by Telemedia Publishing of Toronto's Canadian Living magazine. It soon saw obsolescence and when MasterCook became a more compelling recipe management tool, I switched. It involved a data conversion of about 100 recipes which I knitted my way through thanks to an IT bent from my university and work days.

I am now at a point that the 409 recipes I do have in MasterCook are the keepers. Every once in a while I cull the database. I realize a potentially loved recipe just isn't holding it's own compared to newer ones that have captured my palate. I also now know that I won't keep a recipe just because I tried it. A habit from the past. It really does need to be one that I can say I want to make again.

That lingering box of magazine clippings and recipe cards were ones I had never keyed in. Just not the top priority favourites I guess. Now the time has come where I need to ask myself, will I ever try this recipe any time over this second half of my life. And if it is one I have made, will I ever make it again. Really, will I? If it is a vague answer, out it goes. I want less clutter more than I want to risk losing the recipe that got away.

I am sure you are wondering, what does any of this have to do with cozy, comfy pesto. You might have an inkling as to 'a kitchen maturing', but the pesto? Hang in there, it is coming.

In the stash of recipes cards is a collection that potentially represents the greatest of pesto recipes. I am sure I never made a one of them but they are all written out so neatly. And probably because I never made a one of them, they were never keyed into Foodware, let alone MasterCook.

There were seven pesto recipes. Seven! Now that is getting a little possessive about wanting perfection.
  • Summer Pesto - Canadian Living August 1993 (pg 13 no less - was that important?)
  • Pesto - Select Homes & Food March 1990 (pg 51 - still not important)
  • Basil Pesto - Select Homes & Food May/June 1991 (pg 50 - psychologists unite)
  • Pesto (Basil Sauce) - Canadian Living Cookbook (page 148)
  • Pesto dressing - Canadian Living Magazine 1984 (CL8-845)
  • Pesto Sauce - The Harrowsmith Pasta Cookbook (page 97)
  • Basil Parsley Pesto - Canadian Living Magazine 1985 (CLS -855)
I am not really sure why we never made pesto ourselves over the years. I guess it just seemed to be a treat we had always left for eating out. With my Roots and Shoots Farm CSA food, I have had a good size bunch of basil twice now. And for whatever reason I decided pesto would be the best choice for using it up. So although the anthropological dig has recently uncovered these well archived and cataloged recipes, I just couldn't be bothered with them.

Everybody knows, don't they, that basil pesto consists of basil, toasted pine nuts, extra virgin olive oil, garlic, Parmesan cheese, salt and pepper. So out came the food processor and in went the ingredients, and by instinct, I knew just how much of each. An instinct that comes with a maturity in the kitchen, a cozy relationship with food and it's science. A sense of what order to put things together and then how to tinker. Checking for taste and texture and looks and viscosity. It isn't something that has been memorized. It is about being one with the food. Definitely an 'ah ha' moment.

Our pesto met with the penne and dinner arrived. Filling the hunger and giving the satisfaction that only comes from homemade.

For those of you wanting more than just hand waving about how to make basil pesto, I think it went something like this:

BASIL PESTO

2 cups fresh basil, packed
4 cloves garlic minced (start with 2 and then taste and add a bit at a time - size matters!)
3/4 cup extra virgin olive oil (you may add more once you see the consistency)
1/2 cup toasted pine nuts
3/4 cup freshly grated Parmesan cheese
1/4 teaspoon salt (again your preference if you want to add more)
1/8 teaspoon freshly ground black pepper

Pulse gently in food processor. I prefer it to not be too liquid smooth. I like it with a bit of texture.

Thursday, July 29, 2010

Roots and Shoots Farm - 5th week of CSA Food


Oh how we have been enjoying our food from Roots and Shoots Farm. Since we are signed up for a half share, we receive food every other week, instead of every week. Although this is the 5th week of the program, it is our 3rd food package.

We have never participated in a CSA program before and so we are trying to find our way with it all. Here are some of our feelings about it so far.

Pros:
  • We are receiving very fresh seasonal produce that is locally and naturally grown.
  • We are being 'forced' to try foods we might not otherwise consider.
  • We are trying new recipes to incorporate food we have never used before.
  • We are consuming more vegetables into our diet.
  • We are having a more adventurous approach to menu planning. The mystery can be fun!
  • We are putting more effort into using vegetables at breakfast and lunch time as well.

Cons:
  • It is harder to menu plan when we do not know what we will be receiving in our food basket.
  • The arrival of food on the set day every other week does not always coincide with our plans. If we are not around then we arrange for a friend to pick up the food at the drop location.
  • Our busy summer schedule of socializing out with others or being away does not allow us to use the produce in a timely way that best shows off the produce at its most fresh.
  • We are used to setting a menu and then buying the food in a 'just in time' style of shopping. Our process is now in reverse. We are creating a menu based on what we have on hand. It may not be our 'ideal' menu.
  • We have become a 'slave' to the food basket, wanting to optimize the use of all items to maximize their freshness. Where before, our social plans and work schedule would drive the food plans.
The verdict so far is still in favour of being a part of the CSA program. We are pleased that Roots and Shoots Farm is so dedicated to their product and also wants to be an active and contributing member of the community. This certainly lines up with the values in our kitchen.

Enjoy the photo anthology! We have an exciting week ahead in the kitchen.

BIN #1: A yellow and green zucchini.


BIN #2: A pint of potatoes.


BIN #3: 1.5 pounds of carrots.


BIN #4: Three green peppers and one purple pepper.


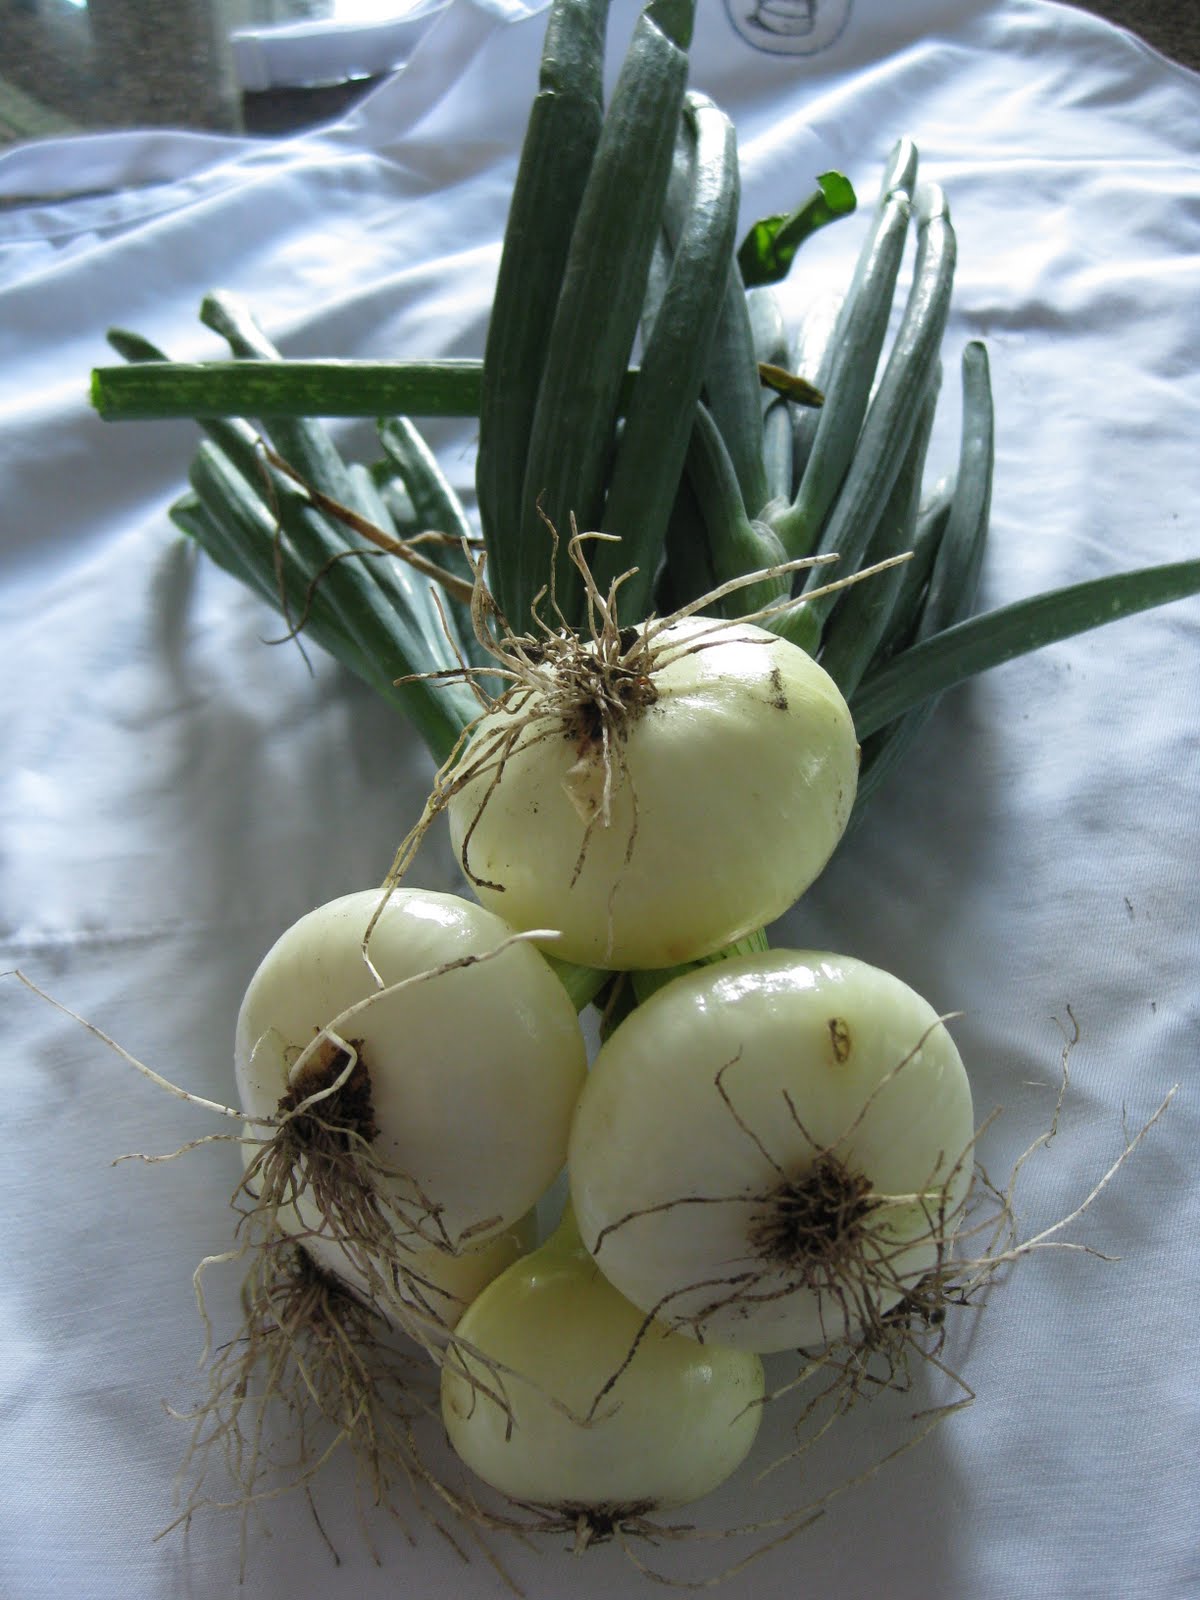
BIN #5: Onions.


BIN #6: Swiss chard.


BIN #7: Mizuna (mustard greens).


BIN #8: Lettuce.


BIN #9: A choice of curly parsley, cilantro or basil. I picked basil!


If you want to learn more about the farm, the contact information for Roots and Shoots Farm is:
ROBIN TURNER
robin@rootsandshootsfarm.com
www.rootsandshootsfarm.com
613.897.8975

Tuesday, July 27, 2010

Hintonburger - The Perfect 'Last Supper' Before The Barron River Canyon


Last Friday evening, we had a chef in our home preparing a many course meal for 3 couples celebrating the same number of years of wedded bliss. You know, fancy dishes with words on the menu like lobster and nage and minus 8 gastrique and fennel pollen. That wonderful evening seems like a life time ago already as we are being whisked along at top speed on the magic carpet ride called life. Since then it has been special evening leftovers and not a whole lot of new fancy foods happening here. I still feel stuffed. I still feel tipsy!

The mister and the teenager are now in the throws of packing up for a multi-day canoe trip through the Barron River Canyon in Algonquin Park. Male bonding. No room for me. The kitchen and table have been taken over by piles of meal planning, camping style. No lobster. No nage. No minus 8 gastrique. No fennel pollen. I didn't really see anywhere for me to create their 'last supper' in that jungle. Their internal dinner bells clanged off around 6:45 pm and the response needed to be instant. The teenager suggested sushi. That just seemed way too urban for pre-camping. Time to set the mood for it all. I suggested the Hintonburger.

The buzz going on about the Hintonburger has been remarkable. A buzz that seems almost on par with the newly opened Taylor's Genuine Food & Wine Bar in Old Ottawa South. How does that happen? When you see this place it is a cross between Jean Burger's near Wakefield and the chip truck at Sunnyside and Bank. You are not going to the Hintonburger for the decor.

It seems everyone has been writing about it and two particular write-ups have done a great job of capturing the history behind its inception and aspects of the business that are particularly important to its identity - organic meat from O'Brien's farm, fresh ingredients from the local Parkdale Market, home-cut fries. Must reads if you want to get the true sense of the Hintonburger. I draw your attention to Ottawa blogger Apartment613's July 12, 2010 entry called Restaurant Watch: The Hintonburger, and also an Ottawa Citizen article by Nicki Thomas called A Burger Joint Blooms in Hintonburg.

Could this be the new Webers that found burger fame near Orillia? Time will tell.

Their smallest burger at 4 ounces, the Armstrong, was all I could muster tonight. ($4.50 taxes in.) I added a small fry for $2.50. Having seen a number of pictures posted on blogs and also Ottawa Foodies, I was thrilled to see that my fries were actually a lot darker. I love them well cooked. Most chip trucks have a small fry at $3.00 or even $3.50, so the Hintonburger's small fry is a deal. I am sure it will help to draw in business and keep them coming back. Next time I will go for the value fry at $1.75. A better size for my appetite. The teenager is very interested in trying their poutine. Tonight his side was a small onion ring at $3.00 and he was very pleased. The small is still a handsome size. He did not finish. Both males went all out with the 6 ounce Hintonburger which came loaded with cheese, bacon and their signature BBQ sauce. They too went for all available toppings (lettuce, onions, tomatoes, pickles, banana peppers, ketchup, mustard, mayo, relish) All 3 hamburgers were baby wipes messy and super gooey yummy.

I considered taking pictures as it always seems to help a blog entry to have many pictures. But I have seen pictures of Hintonburger burgers and they are downright messy and don't seem to exude a 'come hither' about them. Though I have to say Lord of the Wings' methodical and academic labeling of said burger specimen was most thorough. I just couldn't see the Queen chowing down on one though.

So with belly's full of the signature Hintonburger hamburger, some fries and rings, the canoers have upped their food game to such fare as filet mignon and egg-a-muffins as they make their way through the Barron River Canyon. I just hope the bears are looking for a lesser menu.

The Hintonburger
991 Wellington Street West
Ottawa, Ontario
613.724.4676
Facebook Fan Page
Twitter: @Hintonburger
Website: www.hintonburger.ca

Summer Hours:
Sun to Thurs: 11 am - 9pm
Fri and Sat: 11 am - 11 pm

Winter Hours:
Sun: 12 pm - 7 pm
Mon to Thurs: 12 pm - 8 pm
Fri and Sat: 12 pm - 9 pm

Hintonburger on Urbanspoon

Wednesday, July 21, 2010

Red Russian Kale Chips - A Roots and Shoots Farm CSA Treat


My first foray into kale was as beautiful purple cabbages ornamenting my garden. But my view of kale is changing. Yesterday's happy hour snacks consisted of kale chips plus hummus and pita. The idea for kale chips came about thanks to fellow Ottawa food blogger she eats bears.

Her early mention of them was this past autumn in her piece entitled comforting curry. She shares with us that her inspiration for the kale chips actually came from her work associate, Candice. (So you can see where this has become a bit of a 'pay it forward'.) And again a week later, kale chips are still on Marysol's mind in roast chicken and ginger and lemongrass chicken soup. Marysol is true to her love of kale throughout the winter, but in a roasted form. However, the idea and obsession for kale chips does not leave her. She is back talking about them again this May, along with the sister chip, Swiss chard in Grilling Swiss Chard. And at the end of June in Garden Talk - kale, radishes and slugs. And she knows she is not the only one out there doing the kale chip thing. She reveals that Kirsten of Kirsten's Kitchen in Halifax, Nova Scotia has it bad too as we hear in her tale Eat your greens...chip style. Kirsten says she was inspired by Selfish Vegan, who shares her recipe in Computer Chips. And then I find out days ago that Marysol has kicked things to a new level and now those kale chips are being incorporated with other flavours. Read more. Halloumi with Beets and Kale. Marysol, you now really have my attention.

So what's up with kale chips? When I google, I get 357,000 hits. Do we have a kale chip revolution? How could I have been so out of touch?

Let's not forget the rich nutritional content of kale as we rush to make snack of it. This vegetable has high levels of vitamin C, vitamin A, vitamin K, beta carotene and lutein and is quite high on calcium levels too says The World's Healthiest Foods.

When I received red Russian kale in my latest Roots and Shoots Farm CSA food basket, thanks to Marysol, I knew exactly what I was going to do with it.

You can read many recipes that prepare the kale in the oven, instead of my barbecue grill method. I am sure that the oven works very well too and this would be a neat thing to sneak in behind some other baking item to maximize your oven heat.

Next time I would like to try a 'salt and vinegar' version. Maybe also experiment with a sprinkle of Parmesan cheese. You can now add me to the happy kale chippers. And Google search goes to 357,001.

Have you ever made kale chips? What is your most favourite flavour?


KALE CHIPS

bunch of kale, washed and stems removed
olive oil
salt
pepper
garlic powder
lemon juice

Wash and remove the main stem for the kale.


Lay the kale leaves out on a tray and lightly sprinkle with olive oil, salt, pepper, garlic powder and lemon juice.

Place kale leaves directly on barbecue grill and watch carefully as they will 'dry out' and crisp up in minutes. You will see the edges start to go a light brown and the dark, moist colour go out of the leaf.

Monday, July 19, 2010

The Lemon As Its Own Food Group


Oh, if I were in charge of the Canada's Food Guide I think I might make special perfect foods like lemon and cilantro their own food groups. I may be very attracted to these two particular foods because they are so similar. So similar you ask? One is a fruit and the other a leafy plant. One yellow, one green. One 'sturdy', the other more delicate. How could they possibly be similar. Well, for me, I often find that when I use lemons or cilantro is a dish, I tend to use describing words like: 'bright, uplifting, packs big flavour'. They are both 'happy' foods. They make their dishes 'happy'. Not moody like chili or earthy like beets. So for this reason, whenever I am considering making a dessert, I more often than not tend to thing lemon.

Although we don't have dessert often, the other night I had 4 egg whites to 'move along'. They had become the off-spring of the weekend's eggs benedict's hollandaise sauce. Despite the muggy weather, I did the risky thing and converted the egg whites into meringue. We were having special company for dinner and so I constructed 6 well sized nests. My inspiration for the dish came from a Lucy Waverman recipe in the LCBO's Food & Drink Holiday 2007 edition called Lemon Meringue Mousse Cake.

My modifications:
  • Instead of one big meringue, I made 6, one for each for each of my guests.
  • I divided the lemon mousse in half and folded about a half cup of whipped cream into one of the halves.
  • I layered lemon mousse with a lemon mousse whipped cream combo and topped with whipped cream.
  • In general, I used less whipped cream in total than what was called for (1 1/2 cup).
  • I used dark chocolate instead of white for the garnish.
  • And I skipped the lemon dust since I had run out of lemons, but is a really nice touch. A bold, bright taste! :) But I did have a lot of blueberries, so everyone received a few of these.
What types of foods make you think happy?


LEMON MERINGUE MOUSSE CAKE
Author: Lucy Waverman
Source: LCBO Food & Drink Magazine - Holiday 2007
Servings: 8
This is an easy meringue to make. The filling is very lemony. If you are an experienced cook then do the Lemon Dust for the tart, otherwise just omit. To shave white chocolate, use a vegetable peeler - otherwise, grate it.

MERINGUE SHELL:
4 egg whites
3/4 cup sugar
1 tsp lemon juice
LEMON MOUSSE:
3 eggs
1/2 cup sugar
5 tablespoons lemon juice
1 tbsp grated lemon rind
3 tbsp cornstarch
1 cup water
GARNISH:
1 1/2 cups whipping cream
1/2 cup shaved white chocolate
2 tbsp Lemon Dust (recipe follows)

Preheat oven to 250°F (120°C).

Line a baking sheet with parchment paper.

Beat egg whites in an electric mixer until frothy. Slowly beat in sugar. Continue to beat until egg whites are thick and glossy and stand straight up when beaters are lifted out. Beat in lemon juice.

Draw a 10-inch (25-cm) round on the parchment-lined baking sheet and scoop mixture into round, spreading meringue mixture to the sides to make a shell. The sides will be about 2-inches (5-cm) high. It should look like a pie shell.

Bake for 1½ to 2 hours or until lightly browned and dry. Turn oven off and leave for about 4 hours to cool.

Whisk together eggs, sugar, lemon juice and rind together in a pot to make filling. Combine cornstarch and water in another bowl then stir into lemon mixture.

Bring to boil over medium heat, whisking constantly. Remove from heat. If lumpy, pour through a strainer into a separate bowl. Cover with plastic wrap, pressing the wrap into the surface of the lemon filling to prevent a film from forming, and refrigerate until needed.

Spoon lemon filling into meringue shell. Whip cream until it holds its shape and spoon onto top of lemon filling. Scatter with white chocolate shavings and Lemon Dust, if using.

LEMON DUST: Remove the zest from 2 lemons. Use a zester if possible for uniformly thin strips. Place zest in a small pot and cover with water. Bring to a boil, drain and return zest to pot. Cover with water and repeat twice more (this helps the zest dry evenly). Pat dry zest with paper towels. Place zest on a sheet of parchment paper and microwave on high for 7 to 8 minutes, or until zest is dry and crisp but not brown. Grind to a powder in a coffee or spice grinder. Makes about 2 tablespoons of Lemon Dust.

Sunday, July 18, 2010

Sometimes Brunch Isn't About The Food


Sometimes brunch isn't about the food.

Not about the prosecco, nor the latte with thick crema. Not about the buttermilk pancakes brimming with blueberries, nor the pure maple syrup drowning the plate. Not about the crisp hickory smoked bacon, nor the fruit salad and yogurt.

Sometimes brunch is about the beautiful weather. The relaxing lounge on the deck. The music of water dancing splashes from the fountain. The umbrella'd table that seats more than two.

Sometimes brunch is about the wonderful friends that came over to visit and the beautiful hydrangeas that walked in the door with them.

Sometimes brunch is not about the food.

Saturday, July 17, 2010

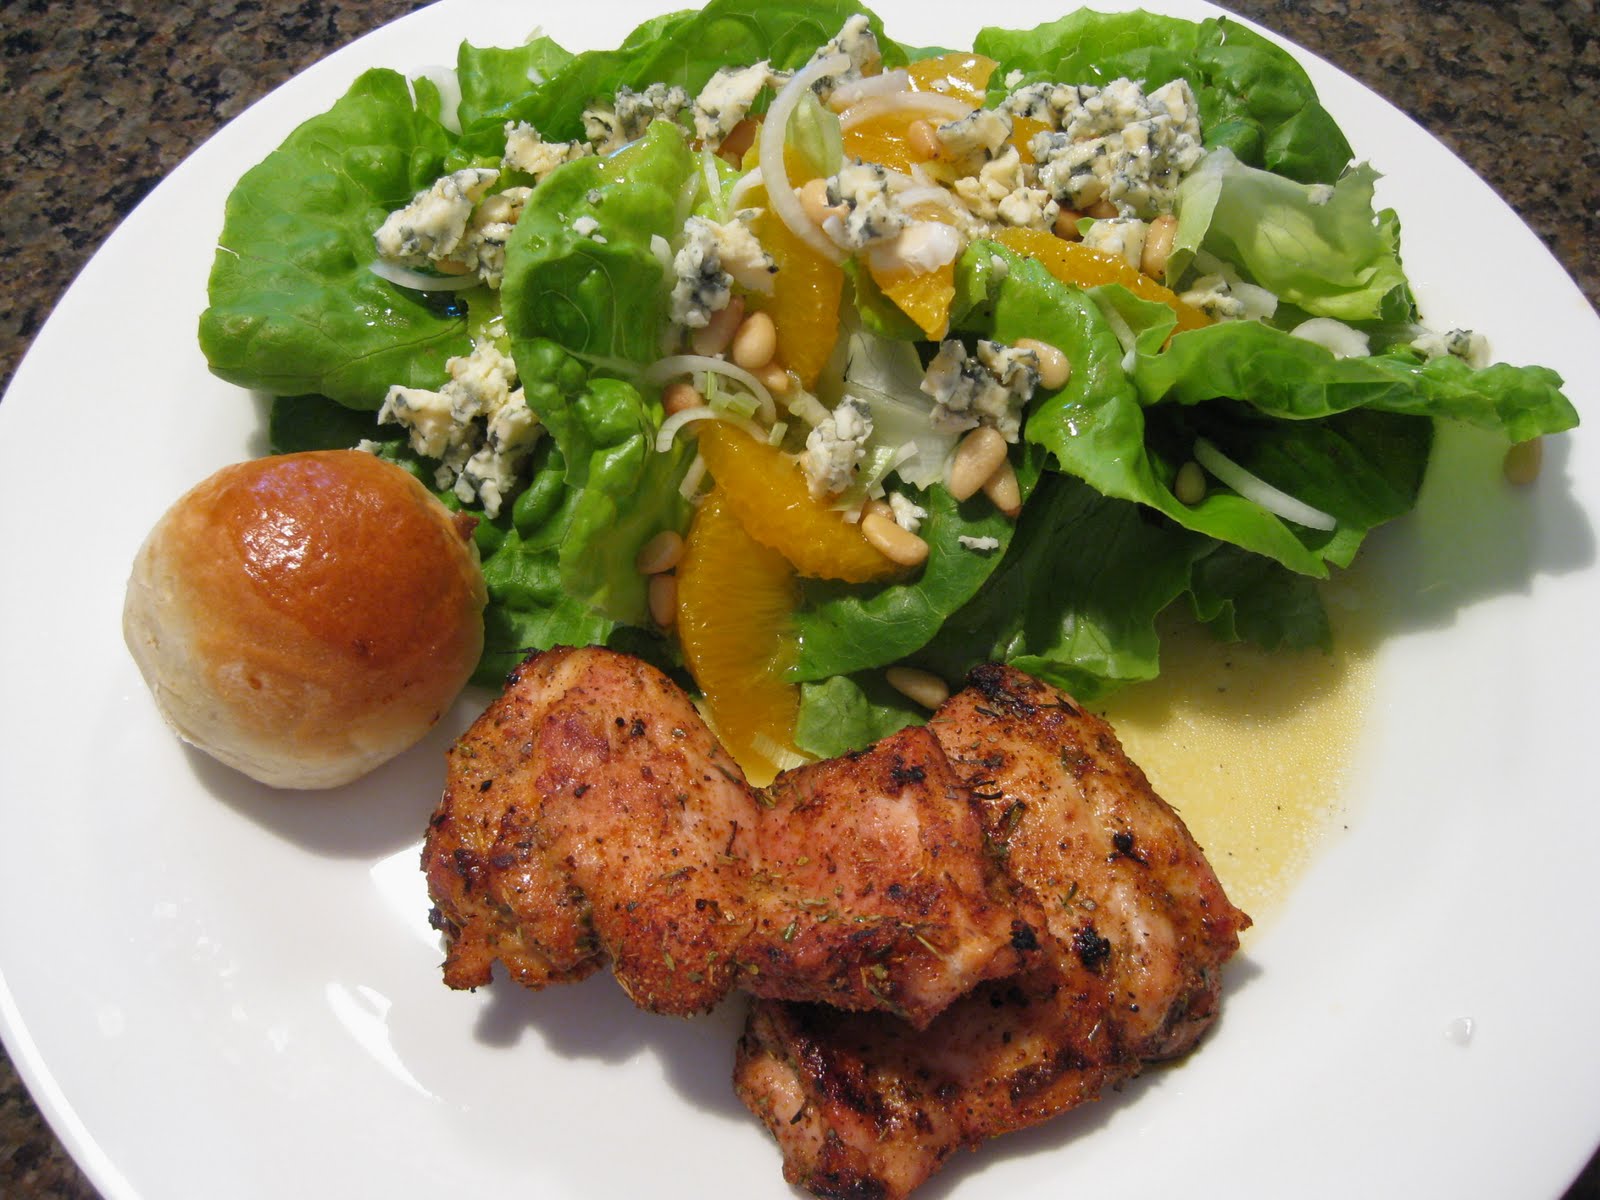
Citrus Salad and Cajun Chicken Thighs


CITRUS SALAD WITH MAPLE ORANGE DRESSING
Servings: 4

SALAD:
1 head lettuce, preferably Boston leaf
2 large oranges, segmented and juiced
1/4 onion, preferably red onion, very thinly sliced
1/4 cup pine nuts, lightly toasted
1/4 cup blue cheese cheese
DRESSING:
4 tablespoons orange juice
5 tablespoons vegetable oil
1 tablespoon maple syrup
1 tablespoon Dijon mustard
1/4 teaspoon ground black pepper
1/4 teaspoon salt

Cut the rind off the orange and cut out each segment. Squeeze juice from the remains. The juice is used in the dressing. Depending on the number of segments, you may need another orange.

Wash lettuce leaves and spin. Leave whole. Arrange on open plates. Decorate each salad with 5 to 8 orange segments. Arrange thin slices of onion and sprinkle with blue chees and toasted pine nuts.

Dressing: Combine dressing ingredients in a jar with a lid and shake vigorously.

Drizzle each salad with dressing when you are ready to serve.

***

CAJUN CHICKEN THIGHS
Source: Weber's Big Book of Grilling
Servings: 8

Rich dark meat coated with a peppery rub, then roasted on the grill...a good excuse for an impromptu barbecue!

1 tablespoon light brown sugar
1 tablespoon granulated garlic
1 tablespoon granulated onion
1 tablespoon paprika
2 teaspoons dried thyme
2 teaspoons dried oregano
2 teaspoons coarsely ground pepper
2 teaspoons kosher salt
16 chicken thighs, boneless, skinless

To make the rub: In a small bowl combine the rub ingredients.

Rinse the chicken thighs under cold water and pat dry with paper towels. Coat with the rub, then brush or spray with olive oil.

Grill the thighs over direct medium heat until the meat is firm and the juices run clear, 8 to 10 minutes, turning once halfway through grilling time. Serve warm.

Wild Sockeye Salmon Bites - Happy Hour Appetizer


Our happy hour appetizers today were wild sockeye salmon bites. We started with slices from a fresh, fresh, fresh Ace Bakery baguette. Then spread the slices with cream cheese (Philadelphia Light Spreadable) On top of this we placed a slice of wild sockeye salmon that we grilled on a cedar plank for a prior dinner. A dollop of red pepper jelly crowned the salmon. Simple, yummy and a great way to use leftovers.

Friday, July 16, 2010

Showcasing Michael Smith's Caramel Sauce on Grilled Pineapple


We have gone a bit fruit crazy of late. It must be a mid-summer harvest thing. Not that I actually harvested pineapple but I was attracted to it when I saw it earlier this week. Once I 'skinned' it, it was clear that it was plenty ripe and needed a party. With company over last night, we decided to grill it on the barbecue.

Now how to finish it. The strawberries had a wee soak in Grand Marnier and the blueberries were getting a dollop of whipped cream. So the naked grilled pineapple signed up for caramel sauce. I have sauced grilled pineapple before and it had a rummy flavour to it. This time I wanted plain and classic. Michael Smith did not let me down. I have never made a classic caramel sauce before. Who would have thought. I will be doing it again. So easy. I think next time I will try a little less cream and see if it comes out even thicker.

MICHAEL SMITH'S CARAMEL SAUCE
Author: Michael Smith
Source: Food Network

1/2 cup water
1 cup sugar
1 cup 35% whipping cream
1 tablespoon vanilla

Pour the water into a saucepan then pour the sugar in a pile in the middle of the water. Turn the heat to medium-high heat and begin cooking without stirring. The sugar will dissolve in the water and begin to boil. The water will evaporate, leaving behind a pure sugar syrup that will then begin to rise in temperature, past the boiling point of water, and into the flavour zone.

When the sugar begins to lightly brown here and there, gently swirl the pan until all of the sugar is a deep golden brown. Carefully pour in the cream and vanilla and whisk until smooth. Cool until thickened or serve hot!
Related Posts Plugin for WordPress, Blogger...