Showing posts with label CSA Recipes 2010. Show all posts

Saturday, October 9, 2010

Thanksgiving Dinner. In a Word. Yummy.


Much of our extended family on both sides lives out of town. So when one is hosting Thanksgiving dinner for just a small group, one might be tempted to eat out. Order in. Or at the very least, consider just a basic selection of dishes to accompany the traditional Thanksgiving bird. Somehow we never seem to execute on any of those suggestions.

This year, like always, magically the little tastes of the many dishes added up to a very full plate. Starting at the top and going clock-wise: Sweet and sour red cabbage, boiled potatoes, baked acorn squash, roasted potatoes, a mix of roasted heirloom carrots (white and orange) and roasted parsnips, baked delicata squash, steamed peas and carrots, grain-fed turkey, stuffing, dreamy gravy.

Roots and Shoots Farm's CSA food baskets helped us out on a number of dishes: Sweet and sour red cabbage, baked acorn squash, roasted potatoes, roasted heirloom carrots, baked delicata squash, and finally onions in the stuffing.


This Thanksgiving we dedicated our meal to a special family that is dealing with a big crisis. For now, it is putting some of them on the other side of the world in New Zealand. Every day is one of big effort, both there on the scene, but also here at home for those left minding the fort. Divided by miles, they are together in love.

I am thankful that our family was able to be under one roof for this special weekend. Making almost a dozen dishes of everyone's favourites was a privilege and a way to honour tradition.

So how was Thanksgiving dinner after all that work? In a word. Yummy.

Sunday, September 26, 2010

Shourabit Adas (Lentil Soup)


Yesterday I made an impromptu visit to the home of my walking buddy and I was lucky enough to have the added pleasure of meeting up with another old friend. This quick visit had me at the kitchen table chatting, sharing and eating for well over 6 hours. The male specimens in the home wondered through every now and again, picking up 'supplies' or just in transition to another room, leaving the chairs full of estrogen to themselves.

I happened upon a day of cooking, with most burners on the stove in full swing. As the time pushed on, I was eventually served up a bowl of the goodness from pot number 1. It was one of her tried and true soups from the cookbook A Taste of Lebanon: Cooking Today the Lebanese Way by Mary Salloum called Shourabit Adas (Lentil Soup). She shared her modifications. (I ended up adding some more of my own.)

I couldn't wait to go home and make it for myself. A big motivator was the very fresh bundle of swiss chard from my latest Roots and Shoots Farm CSA food basket. Not to mention my CSA potatoes and onions.


Today I made a special trip to Brian's Butchery & Deli at 1117 Cobden Road, off of Iris Street, between Woodroffe Avenue and Greenbank Road. For this soup I wanted some reliable lean ground beef. Their main supply of beef is from Alberta. Ultimately I was pleased with its flavour and also the freshness. Pink meat through and through.

Shourabit Adas (Lentil Soup)
Inspired by Mary Salloum's A Taste of Lebanon: Cooking Today The Lebanese Way and by my special walking buddy

1 pound lean ground beef
5 onions, evenly chopped
1 tablespoon butter
1 tablespoon olive oil
2 cups lentils
3 tablespoons ground cumin
4 cups vegetable broth
10 cups water
1 bundle Swiss chard, chopped
12 small potatoes (cherry tomato size), halved or quartered, leaving the skin on
1 teaspoon kosher salt
3/4 teaspoon freshly ground pepper
lemon juice

Heat the butter and oil in a dutch oven. Season the meat. Sauté the beef until fully browned. Add the onions and sauté until the onions are softened.

Add the ground cumin and cook for 1 or 2 minutes to bring out the fragrance of the spice.

Add lentils, broth, water, Swiss chard, potatoes, salt and pepper. Bring to a boil and then simmer with the lid on until the lentils are tender, say 1 hour.  I will let the soup stay on the stove on a low simmer for 3 or 4 hours to let the flavours incorporate.  Add water or broth if it needs thinning.

When you serve it up, sprinkle a few drops of lemon the top of the soup.


Great accompanied with freshly baked bread.

Deconstructed Salad - Simple and Fresh


Our salad tonight was simple and fresh. Each ingredient stood out on its own.

The purple leaf lettuce came in our Roots and Shoots Farm CSA food basket this week, as did the onions.

The Saint Agur Blue cheese was picked up yesterday from Jacobson's Gourmet Concept on Beechwood Avenue at the corner of Acacia Avenue. Saint Agur is a blue cheese made from pasteurized cow's milk from the village of Beauzac in the Monts du Velay, part of the mountainous Auvergne region of central France. It is so rich, creamy and delicious.

The walnuts were toasted first. They came from California. The walnuts are a source of fibre, iron, phosphorus, as well as a source of omega-3 and omega-6 polyunsaturates, and a good source of magnesium.

The navel oranges were sectioned with the extra attention of completely removing the pith, membrane and skin, leaving sweet, tender, juicy citrus wedges.

Dressing: canola oil, fresh orange juice, Canadian pure light maple syrup, Dijon mustard, kosher salt, freshly ground pepper.

The chocolate mint sprig decorating the plate was picked this afternoon from my walking buddy's garden in the heart of Ottawa.

Simple. Fresh. Delicious.

Sunday, September 19, 2010

Delicata Squash Soup


Both of our last two Roots and Shoots Farm CSA baskets included a beautiful delicata squash. Before doing CSA, I had never seen a delicata squash. Or at least, not to my recollection. It is an long oblong shaped squash. It has a cream coloured outer skin with green stripes. The flesh inside is golden tan in colour. The one I received in my latest basket was 9" long.


With the cool September days upon us, the mister decided to make a soup with the two squash. He also included our latest CSA carrots.

For your information, delicata squash soup happens to be the perfect preview to sampling homemade butter tarts!


Delicata Squash Soup

2 delicata squash
1 bunch carrots
2 sprigs rosemary
2 onions
2 stalks celery
1/2 teaspoon nutmeg
5 cups chicken stock
1 cup white wine
salt
pepper
1/2 cup cream
bacon for garnish

Cut the two delicata squash lengthwise and scoop out the seeds. With flesh side down, put in a 9" x 13" pan with carrots and rosemary sprigs. Sprinkle with olive oil, salt and pepper. Roast at 400ºF for 45 minutes until vegetables start to soften and caramelize. Then remove rosemary sprigs.

Meanwhile sauté chopped onions and celery in dutch oven. Add nutmeg and sauté for another minute to bring out the aroma of the spice. Add chicken stock and white wine. Cut up roasted squash, leaving on the skin. The delicata squash skin is quite mild. Add squash and carrots to the broth. Bring mixture to a boil. Simmer for 20 minutes.

Blend until creamy smooth with the Vita-Mix (or blender). Return the soup to the dutch oven and add salt and pepper to season. Bring almost to a boil. Add cream to finish.

Garnish bowl of soup with crumbled double-smoked bacon.

* We used rosemary because that is what we had on hand. We minimized its flavour by just including it in the roasting. Some may prefer the taste of thyme with squash, so feel free to substitute it as your herb in roasting and include it in the blended soup.

Saturday, September 11, 2010

Comfort in Colour


Chicken Pot Pie is usually pretty beige. Ordinary, reliable, plain, not complicated. Well, beige.

Thanks to stash from my last two Roots and Shoots CSA food baskets I had an artist's palette of carrots and potatoes.

When I decided to make Chicken Pot Pie, I knew I was going to have comfort in colour.


Saturday, August 28, 2010

Twisted Kick It Salsa


Our lastest CSA food basket from Roots and Shoots Farm came with a Salsa Making Kit and 'fast' instructions:

"In order to enjoy your tomatoes to the utmost, we have assembled a Salsa Making Kit just for you all! It includes tomatoes, peppers, onions, a hot pepper, and cilantro. Throw the whole thing in the food processor for a great salsa fix, minus the plastic bag of course. You might want to give the onions a wash too!"


Have you ever heard the phrase, "Fools rush in where angels fear to tread."? Well that was me going blindly into salsa time. We were headed to a fun, fancy, food party in the early evening and I just wanted to get my kit into production before it was time to go. Paying no mind to what a balanced salsa might actually contain, I literally followed the instructions, plus a jalapeno pepper we had laying about, and minus the CSA cilantro as I had no idea where it was.

The food processor did a great job but I had pretty much an onion salsa that was high up on the Scoville scale of peppery heat. Perhaps this could be fixed. Right beside me was 4 non-CSA vine-ripe tomatoes on my counter. I beefed up the concoction using every single one of them. Now it was a bit closer to a tomato salsa but still big on onion. The thing with an onion salsa is that you could never find anything like that for sale at the grocery store because absolutely nobody would have any good reason to buy it. Feeling pretty defeated, I headed to the internet to see if there was something I could do with this 'soup', besides use it in soup! No luck. Time was running out. I stewed for an hour or so and then sent the mister to Produce Depot for rescue tomatoes and a bunch of cilantro. "You're just throwing good money after bad." He amused me though and headed out.

6 more tomatoes, 2 minced garlic cloves, a splash of lime juice and a half bunch of cilantro and we appeared to be in business. In business in the sense that I had a ridiculous quantity of salsa now. Far beyond the eating capacity of this home. But at least I had an edible product. The 10 extra tomatoes and the cilantro pulled the Scoville heat in check as well. An appropriate seasoning with sea salt and a bit of freshly ground pepper brought it to a proper finish. A bit runny but not bad.

Since taste seemed to be there, finally, I decided to begin perfecting this creation. Time to make it less 'wet'. I strained off a fair bit of the juice. This will go well in soups or sauces and headed right to the freezer.


I filled container after container with this reasonably awesome salsa. What a roller-coaster ride. I went from 'cockily slapping together a quick salsa' to 'in the depths of despair with a conspicuous quantity of inedible, high heat onion salsa' to 'stiff upper lip, we're not quitters, let's just fix this' to 'well I'll be darned, this stuff is pretty good and maybe we could actually sell this'. The mister just smiled and watched the hurricane move, knowing that eventually like all good hurricanes, they do end and calm returns.

We made it to that fun, fancy food party in good time and the teenager was left behind with all the salsa he could handle for his meal called supper. I tossed him a parting suggestion, "Invite some friends in. Invite them all in."

Monday, August 2, 2010

Mustard Greens in Celebration of Food Day in Canada 2010


Mustard greens, or mizuna, is sometimes said to be piquant, mild peppery flavor, slightly spicy. So when I decided to use them for the Food Day in Canada celebration this weekend, I knew I needed a recipe that stood up to its strength, and for it to also be included with other dishes that would be a bit milder, in order to create balance. I decided to to go a bit Asian with the greens and picked a recipe from Simply Recipes called Mustard Greens.


This recipe allowed me to use all my mizuna and the remaining onions from my Roots and Shoots Farm CSA food basket. I found I tended to enjoy a bite of my mustard greens together with a bite of my stuffed chicken. I love what the sesame oil does to tame the strong taste of the greens. I think toasted sesame seeds could have been a nice touch. It truly was a special Food Day celebration.


MUSTARD GREENS
Source: Simply Recipes

1/2 cup thinly sliced onions
2 cloves garlic, minced
1 Tbsp olive oil
1 pound mustard greens, washed and torn into
large pieces
2 Tbsp chicken broth (2 to 3), or vegetable broth
1/4 teaspoon salt
1/4 teaspoon pepper
1/4 teaspoon dark sesame oil

In a large sauté pan, sauté onions in olive oil over medium heat until the onions begin to brown and caramelize, about 5 to 10 minutes. Add the minced garlic and cook a minute more, until fragrant.

Add the mustard greens and broth and cook until the mustard greens are just barely wilted. Toss with sesame oil. Season with salt and pepper. Serves 4.

Red Chard Risotto in Celebration of Food Day In Canada 2010


The risotto was another great side dish for our Food Day in Canada celebration this weekend. This recipe is adapted from one we found on the Epicurious website called Red Chard Risotto. The motivation for trying the dish was to make something special with our Swiss chard that came in this week's CSA food basket from Roots and Shoots Farm. One of our celebration guests was Italian so she lovingly brought all the ingredients together to perfection. Nice when it can be authentic too!


RED CHARD RISOTTO
Adapted from a recipe by Sandra Rudloff: Los Altos, California found in Bon Appétit - February 1996

5 1/2 cups homemade turkey stock
2 tablespoons olive oil
1 medium onion, chopped
1 1/2 cups arborio rice
1 bunch Swiss chard (about 4 cups of leaves coarsely chopped and then stems diced)
1/2 cup dry white wine
1/2 cup Parmesan cheese, freshly grated
1 tablespoon butter

Bring broth to simmer in medium saucepan. Cover and keep warm.

Remove stems from chard leaves and dice. Coarsely chop chard leaves.

Heat oil in heavy large Dutch oven over medium heat. Add onion and chard stems and sauté until onions are translucent, about 5 minutes.

Add rice and stir for about 3 minutes. Add wine and simmer until absorbed, stirring occasionally, about 2 minutes.

Add hot broth 3/4 cup at a time. Simmer rice and stir constantly until the broth is absorbed. Then add another 3/4 cup of broth and repeat. When the last broth is added, also add the chard leaves. They will cook down very quickly. Simmer until rice is just tender and risotto is creamy. The entire cooking time is about 20 minutes. Mix in 1/2 cup Parmesan cheese; season to taste with salt and pepper. Add butter and stir. Consider adding more Parmesan cheese. Serves 6.

Breaded Stuffed Chicken Breasts with Goat Cheese and Thyme Filling


Our Food Day Canada 2010 party raged on from zucchini rolls to carrot and cilantro soup to a main course loaded up with many things green. The main act was our stuffed chicken. A mild flavour in comparison to our very zesty Italian salad and the strong taste of our Asian mustard greens. I found it worked well to take a bite of my chicken with the mustard greens to balance each other out. It was a plate with pow. I did use a Roots and Shoots Farm CSA onion for the filling. My supply is starting to dwindle. I liked the chicken and would make it again and would put more thyme in the filling or perhaps other flavours with the thyme, like sun-dried tomatoes. It made for a nice presentation sliced vs. just getting the big 'loaf'!


BREADED STUFFED CHICKEN BREASTS WITH GOAT CHEESE AND THYME FILLING
Source: The Best Chicken Recipes by the Editors of Cook's Illustrated


4 boneless skinless chicken breasts, tenderloins removed, 5 to 6 ounces each

cheese filling (see recipe below)

2 cups panko (Japanese bread crumbs), toasted

1/2 cup all-purpose flour

1/4 teaspoon salt

1/8 teaspoon pepper

3 large eggs, lightly beaten

1 teaspoon Dijon mustard


Butterfly each chicken breast by slicing it lengthwise almost in half (starting on the thinnest side) and then opening it to create a single cutlet. Place each cutlet between sheets of plastic wrap and pound until the cutlets are about 1/4-inch thick. Pat the chicken dry with paper towels and season with salt and pepper.


Place a quarter of the cheese filling in the center of the tapered end of each chicken breast. Roll the chicken tightly over the filling to completely enclose it and form a cylinder. Press the seam to seal. Repeat with the remaining chicken and filling. Refrigerate the chicken, seam side down and uncovered, for 1 hour to allow the edges to seal further. This step is very important.


Combine the flour, salt and pepper in a shallow dish and whisk the eggs and Dijon together in a second shallow dish. Working with 1 chicken breast at a time, dredge in the flour, shaking off the excess, then coat with the egg mixture, allowing the excess to drip off. Finally, coat with the panko, pressing gently to adhere the crumbs.


The breaded chicken can be stored in an airtight container in the refrigerator for up to 24 hours. Increase the baking time by 5 to 10 minutes then.


When you are ready to bake, preheat oven to 375ºF and place the chicken at least 1 inch apart on a wire rack set over a foil-lined rimmed baking sheet. Bake until fully cooked (an instant read thermometer should register 160ºF to 165ºF), about 35 minutes.

Let rest for 5 minutes before serving.


Goat Cheese and Thyme Filling


1 tablespoon unsalted butter, softened

1 small onion, minced

2 teaspoons minced fresh thyme leaves

1 small garlic clove, minced

3 oz cream cheese, softened

2 oz goat cheese, softened

1/8 teaspoon salt

1/8 teaspoon ground black pepper


Melt the butter in a medium skillet over medium heat. Add the onion and cook, stirring occasionally, until well browned, about 10 minutes. Stir in the thyme and garlic and cook until fragrant, about 30 seconds; set aside to cool.


Mix the cooled onion mixture, cream cheese, goat cheese, salt, and pepper together until uniform.

Zucchini Rolls with Goat Cheese and Kalamata Olives in Celebration of Food Day Canada 2010


My two beautiful zucchinis from my Roots and Shoots Farm CSA basket this week became our appetizer for our Food Day Canada 2010 celebration.

I have had a similar delight a number of years ago from the The Fine Cooking Magazine July 2002 Issue #51, Page 55 called Grilled Zucchini & Goat Cheese Roll-ups. When I recently came across an adaption of this recipe on the blog site of Dara Michalski (a Canadian living in Utah), whose blog is Cookin' Canuck, I knew exactly where my zucchini's were headed. Dara's Fine Cooking adaptation is called Grilled Zucchini Rolls with Herbed Goat Cheese & Kalamata Olives.

Thank you Dara from bringing back an old favourite for me and giving my summer squash purpose for Food Day Canada 2010! I followed her recipe but used plain goat cheese instead of herbed since that is what I had on hand.


GRILLED ZUCCHINI ROLLS WITH GOAT CHEESE & KALAMATA OLIVES
Adapted from Dara Michalski, whose blog is Cookin' Canuck, and she adapted from a Fine Cooking Magazine recipe

2 zucchinis, one green and one yellow
Olive oil
Kosher salt
Freshly ground black pepper
3 1/2 oz. goat cheese
1 1/2 oz. (about 7 or 8) kalamata olives, finely chopped

Preheat grill to high heat.

Slice a strip lengthwise from the zucchini to expose the inside of the vegetable. Cut the 2 ends from the zucchini to make straight edges. Cut the zucchini lengthwise into 1/4-inch strips. You should get about 7 slices per zucchini. I use a mandolin to make the slices.

Brush both sides of the zucchini pieces liberally with olive oil. Season well with kosher salt and freshly ground black pepper. Lay the zucchini pieces on the grill at a 45-degree angle (for more attractive grill marks). Cook until the zucchini is very tender, but not mushy, about 3 minutes per side, moving the pieces during cooking to ensure even browning.

Remove zucchini from the grill. Set a wire cooling rack on top of a bowl to give the cooling rack extra clearance from the counter. Drape the zucchini pieces on the rack to cool. This method will stop the zucchini from steaming will cooling.

Place goat cheese in a medium bowl. Stir olives into the goat cheese.

Spread a layer of the goat cheese mixture onto one side of each zucchini piece. Gently roll each piece of zucchini. Serve.

I was able to get 15 rolls from my two zucchinis.

Carrot Soup with Coriander in Celebration of Food Day Canada 2010


Food Day Canada
was a great day to use produce from my latest CSA food basket from Roots and Shoots Farm. The soup I made incorporated all my orange and white carrots, two of my onions and two of my potatoes. We ate outside under the beautiful night sky with special friends, many a candle lit, the fountain flowing and nary a bug in sight.


CARROT SOUP WITH CORIANDER

2 pounds carrots
1 potato
3 ounces unsalted butter
1 small onion, peeled and diced
1 tablespoon chopped garlic
3 tablespoons fresh cilantro
4 cups chicken broth
1/2 teaspoon sugar
1/4 teaspoon salt
1 large bay leaf
1/8 teaspoon celery salt
1/8 teaspoon cayenne
1/4 cup chopped fresh cilantro
dry sherry
homemade croutons
deep-fried onion greens, match stick width and 2" in length

Peel the carrots and cut crosswise into 1/2 inch pieces (about 5-6 cups). Peel the potato and cut into small cubes (about 1 1/2 cups).

In a large saucepan over medium-low heat, melt the butter. When hot, add the onion and sauté while stirring occasionally, until translucent, 5-6 minutes. Add the garlic and sauté while stirring until beginning to change color, 20-30 seconds.

Add the carrots, potatoes, and fresh coriander and sauté, stirring a couple of times, for about 2-3 minutes. Add the chicken broth, sugar and salt and, over medium heat bring to a simmer. Lower the heat, cover partially and continue simmering until vegetables are soft when pierced with the point of a knife, about 20-25 minutes.

Use a food processor with its metal blade attached, or a blender, and process the vegetables in small batches, with their broth, until a smooth purée (soup may be made ahead to this point; cover and refrigerated). We use our Vita-Mix and it always gives a great consistency for soup.

Return the soup to the saucepan. Add the bay leaf, celery salt and cayenne to the soup and let it simmer on a very, very low simmer for 2 or 3 hours to really incorporate the flavours. An hour before serving, add more fresh cilantro, finely chopped. Taste for seasoning and adjust as necessary. If the soup is too thick, add more stock or you could use milk. Remove the bay leaf.


To plate, put one tablespoon of sherry in the bottom of each bowl. Ladle the soup on top. Garnish with homemade croutons (I make mine with a hint of garlic and black pepper for a kick) and deep-fried onion greens. Another way to garnish could be a dollop of sour cream and a generous sprinkling of chopped cilantro.

Saturday, July 31, 2010

Cozy, Comfy Pesto - A Kitchen Maturing


There is no picture of the pesto penne dinner tonight because it was that good. Gone before the idea of a camera entered our heads.

I am at stage in my life where I want less, not more. Less clutter, less issues, less to-do's, less noise, less stuff. I have a few boxes of keepsakes and trinkets from my past down in the basement. The volume is not embarrassing. I have boxes of half started projects, put on hold for more important uses of my time. Again, the volume is not embarrassing. I have a box of clippings of recipes and food stories that someday I might try. Still, the volume is not embarrassing. And tucked in that box of recipe clippings is part of my historical collection of recipes actually written out on 4" x 6" recipe cards.

Some 15+ years ago I decided to launch into the digital age and I keyed most of the favourite recipes collected to-date into a product called Foodware, a software product by Telemedia Publishing of Toronto's Canadian Living magazine. It soon saw obsolescence and when MasterCook became a more compelling recipe management tool, I switched. It involved a data conversion of about 100 recipes which I knitted my way through thanks to an IT bent from my university and work days.

I am now at a point that the 409 recipes I do have in MasterCook are the keepers. Every once in a while I cull the database. I realize a potentially loved recipe just isn't holding it's own compared to newer ones that have captured my palate. I also now know that I won't keep a recipe just because I tried it. A habit from the past. It really does need to be one that I can say I want to make again.

That lingering box of magazine clippings and recipe cards were ones I had never keyed in. Just not the top priority favourites I guess. Now the time has come where I need to ask myself, will I ever try this recipe any time over this second half of my life. And if it is one I have made, will I ever make it again. Really, will I? If it is a vague answer, out it goes. I want less clutter more than I want to risk losing the recipe that got away.

I am sure you are wondering, what does any of this have to do with cozy, comfy pesto. You might have an inkling as to 'a kitchen maturing', but the pesto? Hang in there, it is coming.

In the stash of recipes cards is a collection that potentially represents the greatest of pesto recipes. I am sure I never made a one of them but they are all written out so neatly. And probably because I never made a one of them, they were never keyed into Foodware, let alone MasterCook.

There were seven pesto recipes. Seven! Now that is getting a little possessive about wanting perfection.
  • Summer Pesto - Canadian Living August 1993 (pg 13 no less - was that important?)
  • Pesto - Select Homes & Food March 1990 (pg 51 - still not important)
  • Basil Pesto - Select Homes & Food May/June 1991 (pg 50 - psychologists unite)
  • Pesto (Basil Sauce) - Canadian Living Cookbook (page 148)
  • Pesto dressing - Canadian Living Magazine 1984 (CL8-845)
  • Pesto Sauce - The Harrowsmith Pasta Cookbook (page 97)
  • Basil Parsley Pesto - Canadian Living Magazine 1985 (CLS -855)
I am not really sure why we never made pesto ourselves over the years. I guess it just seemed to be a treat we had always left for eating out. With my Roots and Shoots Farm CSA food, I have had a good size bunch of basil twice now. And for whatever reason I decided pesto would be the best choice for using it up. So although the anthropological dig has recently uncovered these well archived and cataloged recipes, I just couldn't be bothered with them.

Everybody knows, don't they, that basil pesto consists of basil, toasted pine nuts, extra virgin olive oil, garlic, Parmesan cheese, salt and pepper. So out came the food processor and in went the ingredients, and by instinct, I knew just how much of each. An instinct that comes with a maturity in the kitchen, a cozy relationship with food and it's science. A sense of what order to put things together and then how to tinker. Checking for taste and texture and looks and viscosity. It isn't something that has been memorized. It is about being one with the food. Definitely an 'ah ha' moment.

Our pesto met with the penne and dinner arrived. Filling the hunger and giving the satisfaction that only comes from homemade.

For those of you wanting more than just hand waving about how to make basil pesto, I think it went something like this:

BASIL PESTO

2 cups fresh basil, packed
4 cloves garlic minced (start with 2 and then taste and add a bit at a time - size matters!)
3/4 cup extra virgin olive oil (you may add more once you see the consistency)
1/2 cup toasted pine nuts
3/4 cup freshly grated Parmesan cheese
1/4 teaspoon salt (again your preference if you want to add more)
1/8 teaspoon freshly ground black pepper

Pulse gently in food processor. I prefer it to not be too liquid smooth. I like it with a bit of texture.

Wednesday, July 21, 2010

Red Russian Kale Chips - A Roots and Shoots Farm CSA Treat


My first foray into kale was as beautiful purple cabbages ornamenting my garden. But my view of kale is changing. Yesterday's happy hour snacks consisted of kale chips plus hummus and pita. The idea for kale chips came about thanks to fellow Ottawa food blogger she eats bears.

Her early mention of them was this past autumn in her piece entitled comforting curry. She shares with us that her inspiration for the kale chips actually came from her work associate, Candice. (So you can see where this has become a bit of a 'pay it forward'.) And again a week later, kale chips are still on Marysol's mind in roast chicken and ginger and lemongrass chicken soup. Marysol is true to her love of kale throughout the winter, but in a roasted form. However, the idea and obsession for kale chips does not leave her. She is back talking about them again this May, along with the sister chip, Swiss chard in Grilling Swiss Chard. And at the end of June in Garden Talk - kale, radishes and slugs. And she knows she is not the only one out there doing the kale chip thing. She reveals that Kirsten of Kirsten's Kitchen in Halifax, Nova Scotia has it bad too as we hear in her tale Eat your greens...chip style. Kirsten says she was inspired by Selfish Vegan, who shares her recipe in Computer Chips. And then I find out days ago that Marysol has kicked things to a new level and now those kale chips are being incorporated with other flavours. Read more. Halloumi with Beets and Kale. Marysol, you now really have my attention.

So what's up with kale chips? When I google, I get 357,000 hits. Do we have a kale chip revolution? How could I have been so out of touch?

Let's not forget the rich nutritional content of kale as we rush to make snack of it. This vegetable has high levels of vitamin C, vitamin A, vitamin K, beta carotene and lutein and is quite high on calcium levels too says The World's Healthiest Foods.

When I received red Russian kale in my latest Roots and Shoots Farm CSA food basket, thanks to Marysol, I knew exactly what I was going to do with it.

You can read many recipes that prepare the kale in the oven, instead of my barbecue grill method. I am sure that the oven works very well too and this would be a neat thing to sneak in behind some other baking item to maximize your oven heat.

Next time I would like to try a 'salt and vinegar' version. Maybe also experiment with a sprinkle of Parmesan cheese. You can now add me to the happy kale chippers. And Google search goes to 357,001.

Have you ever made kale chips? What is your most favourite flavour?


KALE CHIPS

bunch of kale, washed and stems removed
olive oil
salt
pepper
garlic powder
lemon juice

Wash and remove the main stem for the kale.


Lay the kale leaves out on a tray and lightly sprinkle with olive oil, salt, pepper, garlic powder and lemon juice.

Place kale leaves directly on barbecue grill and watch carefully as they will 'dry out' and crisp up in minutes. You will see the edges start to go a light brown and the dark, moist colour go out of the leaf.

Thursday, July 1, 2010

Roots and Shoots Farm - Our First CSA Pickup!


I am living the experience of participating in my first relationship with a CSA farm. This farm, Roots and Shoots, started sharing its bounty yesterday afternoon. Perhaps I was bit too keen, as we were first to the pickup location and were witness to Danny unloading the fresh produce from the back of the truck. Our takeaway included one item from each of the bins.

If you want to learn more about the farm, the contact information for Roots and Shoots Farm is:
ROBIN TURNER
robin@rootsandshootsfarm.com
www.rootsandshootsfarm.com
613.897.8975


Beautiful beets and succulent carrots.


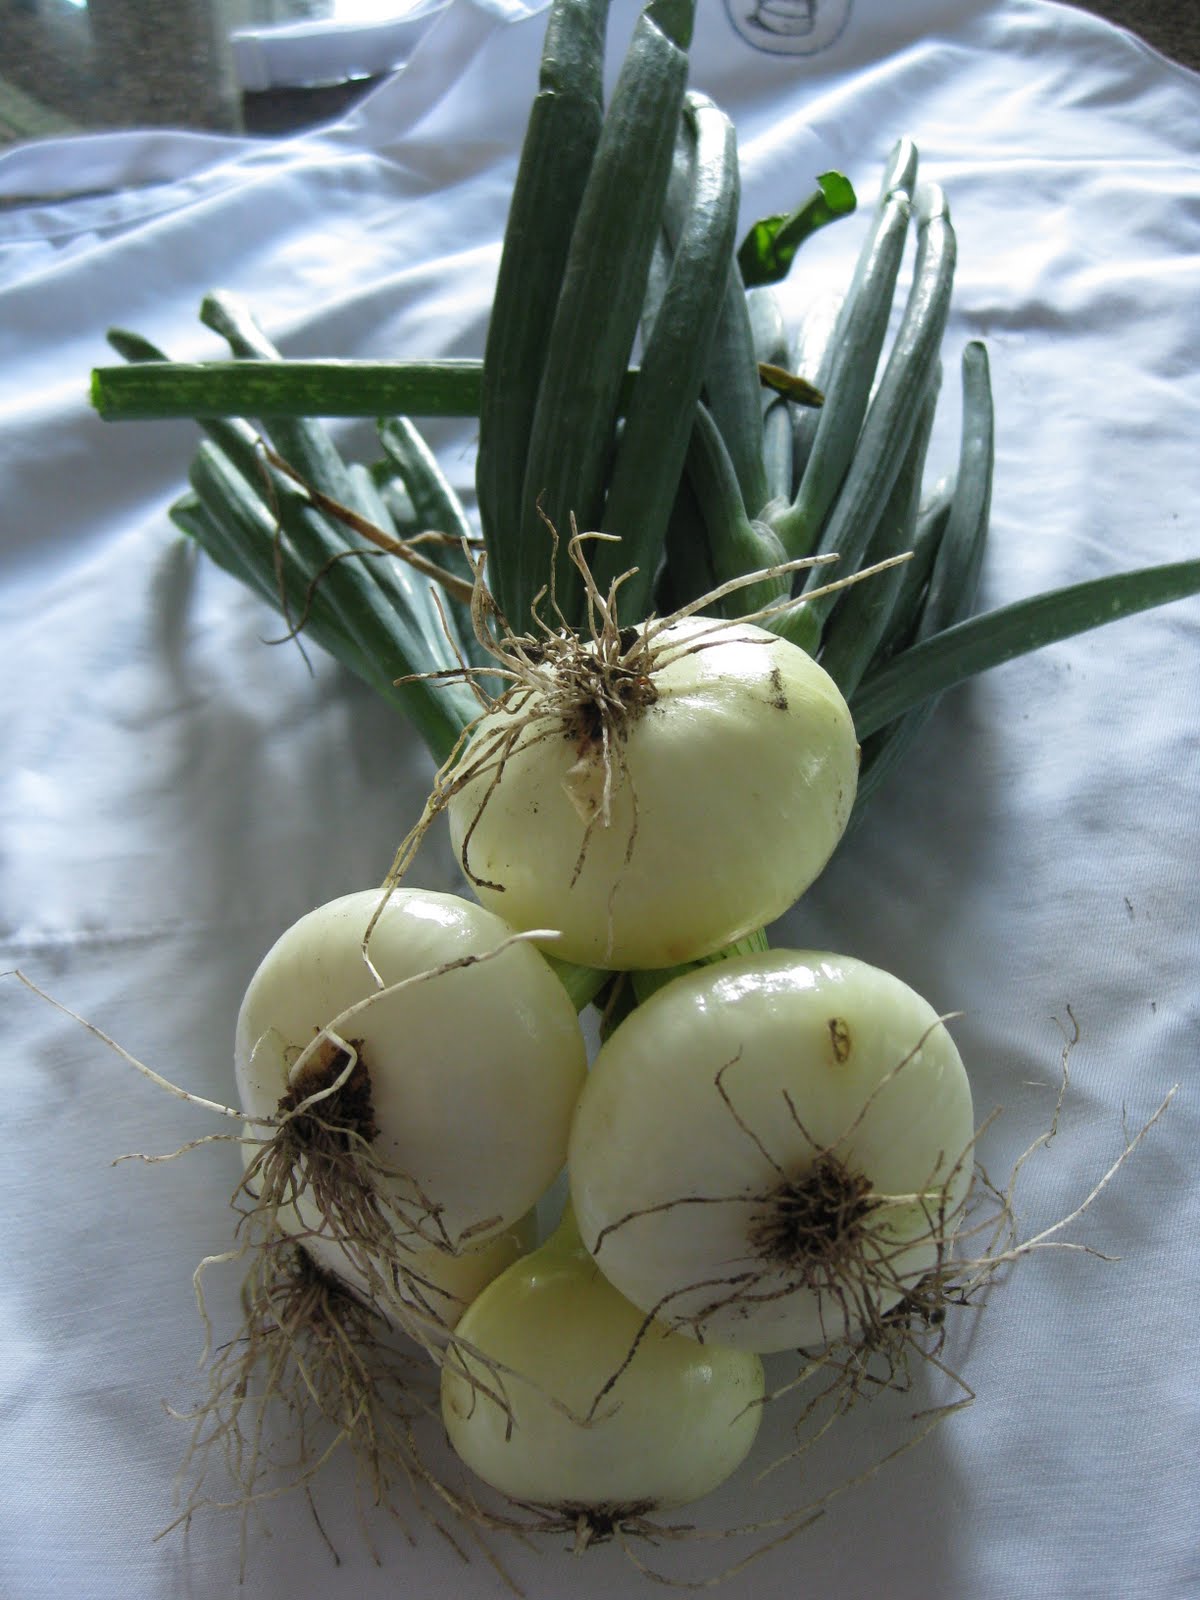
A bunch of onions and then fresh cilantro and a small bag of peas.


Hakurei turnips and Easter egg radishes.


Bok choi bundled with tats soi and a head of red leaf lettuce.

Tonight we made a salad for part of dinner using the red leaf lettuce and an Easter egg radish, as well as a few sprigs of the cilantro. To that we added tomatoes, red pepper and red onion. The champagne vinaigrette was the perfect match.

We served the salad with grilled sausages from The Piggy Market at 400 Winston Avenue in Westboro. Tonight we tried two pork sausages - Beaus'Wurst and Maple Chipotle. They were delicious but pricey at $32/kg. A treat for sure at about $4.50 a sausage and only you can decide if your food budget can include them as regulars on your menu at home. We each had 1 1/2 sausages with our salad.

Tomorrow we have mapped out stir-fried bok choi with garlic, ginger and scallions to go with our Thai marinated roast chicken with lemongrass-peanut pan sauce. And I am hoping we can somehow incorporate the carrots too.

We still have lots of eats ahead of us with our quality fresh, naturally-grown, seasonal produce. Any ideas on what we can do with it all?

CHAMPAGNE VINAIGRETTE
Author: Patrick and Gina Neely from Down Home with the Neelys
Source: Epicurious - May 2009

1 garlic clove, finely chopped
2 tablespoons Dijon Mustard
1/4 cup champagne vinegar
2 tablespoons fresh lemon juice
2 tablespoons honey
2 to 3 dashes hot sauce
1/2 teaspoon salt
1/2 teaspoon freshly ground black pepper
1/2 cup extra virgin olive oil

Whisk together the garlic, mustard, vinegar, lemon juice, honey, hot sauce, salt, and pepper in a large bowl. Slowly whisk in the olive oil until the dressing is emulsified. Alternatively, you can combine all the ingredients in a blender or a food processor and purée until smooth.

Yield: 3/4 cup
Related Posts Plugin for WordPress, Blogger...